Roomba helps you a lot with the cleaning; however, it can’t clean itself.
If you want your robot vacuum to work at peak performance, then you have to give it frequent maintenance.
From what I’ve observed, an amount of debris including dirt, hair, fur, and dust usually takes a toll on my Roomba after a couple of cleaning cycles. If you leave it like that, the vacuum will work less efficiently for sure and slowly damage the battery and even whole system.
So, how to clean Roomba filter?
Learn more with the following information…
Table of Contents
4 Steps to Clean Your Roomba Bin Filter
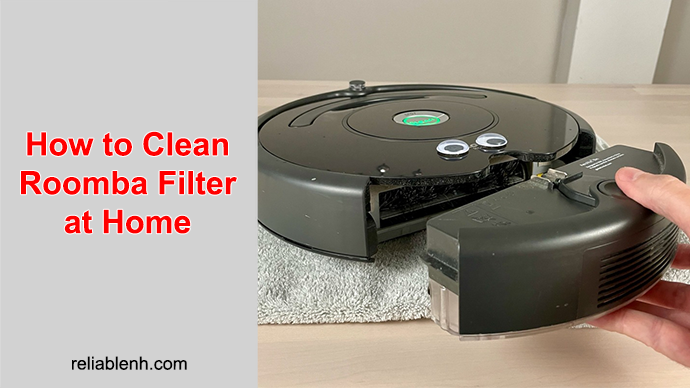
It’s never too late to start cleaning your Roomba filter.
The cleaning steps can differ because the bin filter is not the same with all Roomba models. For example, the 600 series has a curved filter staying inside the bin, while the 800 and 900 series have a rectangular filter cartridge staying on the top of the bin. Lastly, the E and I series have a rectangular filter cartridge as well but it’s on the side of the bin.
See also: The best self-emptying robot vacuums in 2026
In this article, I’m going to show you steps to clean the bin filter of Roomba 675 as it’s the most popular.
1. Remove the bin
The first thing to do is to remove the bin and open it.
I believe you all know how to do this, right?
Simply press the release button on the top of your robot vacuum, then pull out the bin. In case you find debris in the bin from a prior cleaning, just continue tap the yellow level so that the bin door will be opened. Then, clean any gunk you see there.
2. Remove the filter
Next, we’re close to the main event, please look for the big filter with blue color which is now probably covered with dirt.
How to remove the bin filter?
With the 600 series, you just need to squeeze the yellow tabs on both sides of the filter using your fingers and slide it out after that.
3. Clean the filter
See all the dust and dirt stuck on the filter?
The only thing to do is cleaning them. The method I often use is to knock the dust off by tapping your bin filter against the inside of the waste basket repeated. Or, if you’re terribly allergic to dust, you can scrape them off using a piece of dry cloth or towel.
You can just use your hand to pull away dust clogging the filter.
Read more: 3 Best Self Emptying Robot Vacuum Choices to Buy
If your Roomba is the 800, 900, E or I series, a better idea to clean the filter is to vacuum it with a handheld vacuum. It helps avoid dust escape into the air or back onto the floor. It’s much easier with this trick, right?
But, keep in mind that NEVER wash the air filter through water because you will surely ruin it.
4. Place the filter back
As soon as you finish the cleaning and the filter no longer looks dirty, let’s put it back to the bin and slide the bin back to your robot vacuum. Now you’re done!
You can log in to the iRobot app and start scheduling cleaning tasks for Roomba again to see how different it is after the filter is cleaned. I guarantee that the performance will be as excellent as the first time.
Remember to keep cleaning Roomba filter to maintain its peak condition.
How Often Should You Clean Roomba Filter?
Of course there’s nothing in this world that can last for a long time without any proper maintenance, Roomba is not an exception. So if you want your little helper to work efficiently from time to time, the key is to clean its filter on a regular basis.
According to iRobot recommendation, a good filter cleans once a week, or twice in case you have pets in the house. For those running your Roomba frequently, then you have to clean the filter once every couple of weeks.
You should also rinse Roomba bin often with warm water and let it air dry.
Once a week, on every Sunday or whenever you find yourself having any spare time, you should give your robot vacuum mid-level maintenance. Once a month, it’s time for a more in-depth cleaning and you have to prepare a screwdriver.
How Often Should You Replace Roomba Filter?
Let me remind you that cleaning your Roomba filter is just the first step. There are still plenty of parts in need of periodic maintenance, such as brushes and wheels, sensors, and electrical contacts.
But at some point, cleaning can no longer get the performance better.
After using it for a while, it’s a must to replace your Roomba filter. In fact, this part needs to be replaced quite often; probably once every two months based on iRobot advice. If you haven’t replaced the filter for your Roomba after more than two months, you should do it now.
For your reference, iRobot does offer a three-pack of replacement filters for Roomba 500 and 600 series at a reasonable price: only $25. No need to go out, you still can find any authentic Roomba replacement parts on Amazon with great deals as well.
To Wrap up
I believe you already know how to clean Roomba filter after reading this post, right?
If you’re looking for a new Roomba, we have some best options for apartments.
For those whom have just bought a Roomba recently, you may be still confused with using it; however, don’t miss the guide of cleaning the bin filter here because it’s necessary. With a big investment, you definitely don’t want it to show low cleaning capacity after a few times working.
No matter how efficient it is, it will soon be damaged without periodic cleaning and maintenance. Today’s guide informs you simple tips you need to know when it comes to cleaning the bin filter.
For more details, please leave your comment below.
Can you wash a Roomba filter? No — and here is why
Short answer: do not run a Roomba filter under the tap. iRobot’s filters are not washable. Water swells and warps the pleated media, and once it dries the filter no longer seals against its housing. Fine dust then bypasses the filter entirely and goes into the motor.
The damage is invisible. A washed filter looks clean and performs worse than the dirty one you started with.
The correct method takes ten seconds:
- Remove the bin and slide the filter out.
- Hold it over a bin and tap the frame — not the media — firmly against the edge.
- Brush loose debris off the outer surface with the cleaning tool or a dry brush.
- Slide it back in dry.
Never vacuum a Roomba filter with another vacuum either. The suction pulls the pleats out of shape.
The rest of the weekly clean, beyond the filter
Cleaning the filter alone fixes suction. It does not fix a robot that stalls, spins, or refuses to cross a dark rug. Those come from four other parts.
Cliff sensors — do these first
Four to six small windows on the underside near the front bumper. When they are dusty the robot reads a normal floor as a drop and refuses to advance, or reverses away from dark flooring for no visible reason.
Wipe each one with a dry cloth or a melamine sponge. Monthly, or immediately if the robot starts behaving strangely. This single step resolves more “my Roomba is broken” cases than anything else on the list.
Brushes and extractors
Pop out the brush guard and lift both brushes or extractors free. Pull hair off by hand, then use the cleaning tool to cut through anything wound tight. Check the yellow end caps — hair collects behind them, jams the bearings, and makes the motor stall. Pull each cap off and clear it.
Do this weekly with pets or long hair in the house; every two weeks otherwise.
Side brush
One screw. Remove it, unwind the hair from the post, refit. A side brush whose arms have taken a permanent bend no longer reaches the skirting board and should be replaced.
Front caster wheel
The small swivel wheel at the front. Pull the whole wheel assembly straight out of its housing, then pull the wheel off its axle. The amount of compacted hair in there is usually the surprise of the job. A seized caster makes the robot judder, veer off course, and drag on carpet.
Dust bin
Empty after every run. Wipe the inside dry. If the bin has no electronic contacts on the model you own you can rinse the plastic housing — but the filter stays out, and the bin must be bone dry before it goes back in.
Maintenance schedule
| Task | Frequency |
|---|---|
| Empty dust bin | After every run |
| Tap out the filter | Weekly |
| Clear brushes and end caps | Weekly with pets, otherwise fortnightly |
| Clean side brush | Fortnightly |
| Wipe cliff sensors | Monthly, or at the first sign of odd navigation |
| Clear front caster wheel | Monthly |
| Wipe charging contacts (robot and dock) | Monthly |
| Replace filter | Every couple of months |
| Replace extractors or brushes | Every 6–12 months, or when visibly worn |

Leave a Reply